Welcome to the SV3C Camera Manual, your comprehensive guide to setting up and optimizing your security camera. This manual provides detailed instructions for installation, network configuration, and feature customization, ensuring optimal performance and security for your surveillance needs.
1.1 Overview of the SV3C Camera Series
The SV3C Camera Series offers a diverse range of high-quality security cameras designed for both indoor and outdoor use. These cameras are known for their advanced features, including high-resolution video, night vision, and motion detection. The series includes models with varying resolutions, such as 5MP and 4K, ensuring clarity in surveillance. Many SV3C cameras support PoE (Power over Ethernet) and WiFi connectivity, making installation flexible and convenient. Additionally, features like two-way audio and cloud storage integration enhance functionality. Whether for home security or commercial monitoring, the SV3C Camera Series provides robust solutions tailored to meet different needs, ensuring reliable performance and ease of use.
1.2 Importance of Reading the Manual
Reading the SV3C camera manual is essential for optimizing performance and understanding its features. It provides detailed instructions for installation, configuration, and troubleshooting, ensuring proper setup and functionality. The manual highlights safety precautions, warranty information, and maintenance tips, helping users avoid potential issues. By understanding advanced settings and customization options, users can tailor the camera to their needs. The manual also serves as a quick reference for resolving common problems, saving time and frustration. Familiarizing yourself with the manual ensures you get the most out of your SV3C camera, enhancing security and monitoring capabilities effectively.
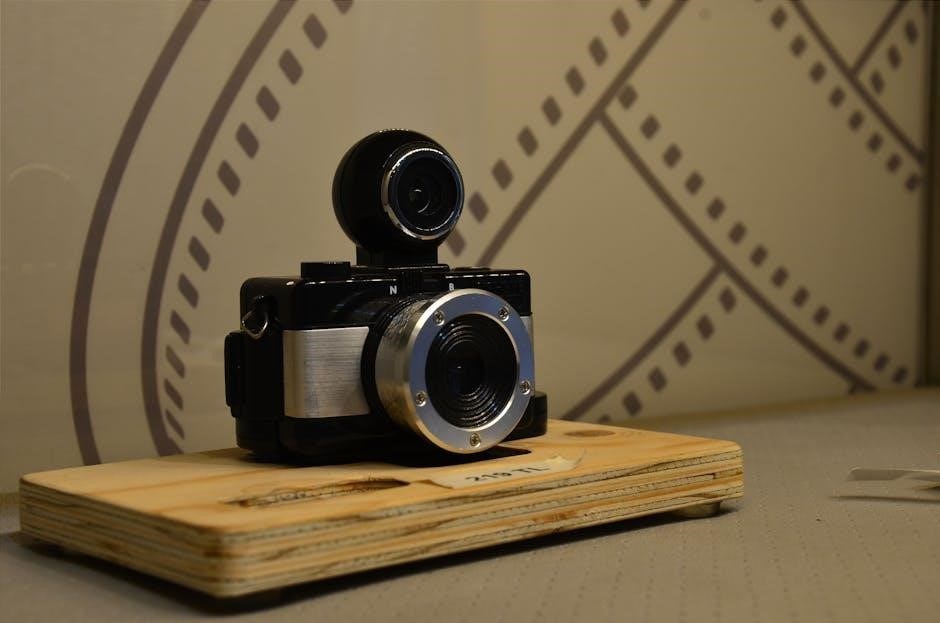
Unboxing and Physical Installation
This section guides you through unpacking, understanding included components, and physically installing your SV3C camera. Essential steps ensure proper setup and functionality for optimal performance.
2.1 What’s Included in the Box
Your SV3C camera package includes essential components for immediate setup. The box contains the camera unit, a power adapter, an Ethernet cable, mounting hardware (screws and brackets), and a quick start guide. Additionally, you may find an Allen wrench for adjusting the camera’s angle and focus. Some packages include a reset needle for factory resets. Ensure all items are present before proceeding with installation. The camera is designed for both indoor and outdoor use, with weather-resistant housing. Verify the completeness of your package to ensure a smooth setup process. If any items are missing, contact customer support immediately. This ensures your camera is ready for mounting and configuration right out of the box.
2.2 Connecting the Camera to a Power Source
To power your SV3C camera, locate the power port on the camera’s base. Insert the provided power adapter into the port, ensuring a snug and secure connection. Plug the other end of the adapter into a nearby electrical outlet. If using PoE (Power over Ethernet), connect the Ethernet cable to both the camera and your PoE-enabled router or switch. Ensure the power source matches the camera’s voltage requirements (typically 5V DC). Once connected, the camera will power on automatically. For outdoor setups, use weatherproof plugs and cables to prevent damage. Always follow safety guidelines to avoid electrical hazards. The camera should now be ready for further configuration.
2.3 Mounting the Camera Indoors or Outdoors
Mount your SV3C camera securely using the included mounting hardware. For indoor mounting, attach the bracket to a wall or ceiling using screws. For outdoor installation, ensure the surface is sturdy and weatherproof. Align the camera for optimal viewing angle and connectivity. Use the provided spirit level to ensure proper alignment. Tighten all screws firmly to prevent movement. Outdoor installations may require additional weatherproof fixtures to protect against moisture. Choose a location with clear visibility and proximity to power sources. Test the camera’s orientation before finalizing the mount. Always follow safety precautions to avoid accidents. Once mounted, adjust the camera’s position as needed for the best coverage.
Network Configuration and Connectivity
Configure your SV3C camera’s network settings to ensure reliable connectivity. Connect via Ethernet or WiFi, access the web interface, and set up IP addresses for seamless monitoring.
3.1 Setting Up WiFi Connectivity
To set up WiFi connectivity for your SV3C camera, follow these steps:
- Power on the camera and access its web interface via a browser.
- Navigate to the network settings menu and select WiFi mode.
- Scan for available networks and select your desired WiFi network.
- Enter the network password to establish a connection.
- Confirm the connection status via the camera’s LED indicators or interface.
For optimal performance, ensure the camera is within range of the router and avoid physical obstructions that may weaken the signal.
3.2 Configuring Power Over Ethernet (POE)
Configuring Power Over Ethernet (POE) for your SV3C camera simplifies installation by delivering power and data through a single Ethernet cable. Ensure your camera supports POE (check the model, e.g., SV3C S6 series). Connect one end of a CAT5 or higher Ethernet cable to the camera’s POE port and the other to a POE-enabled switch or injector. Power on the switch or injector, and the camera will automatically receive power. Verify the connection by checking the camera’s LED indicators or through its web interface. For non-POE switches, use a separate POE injector. Always ensure compatibility to avoid damage to the camera.
3.3 Customizing IP Address Settings
To customize the IP address settings for your SV3C camera, access the device through its web interface. Open a web browser and enter the camera’s default IP address (typically 192.168.1.108). Log in using your admin credentials. Navigate to the Network Settings section, where you can manually assign a static IP address or configure DHCP settings. Enter the desired IP address, subnet mask, gateway, and DNS server details. Ensure the IP address is unique within your network to avoid conflicts. Save the changes and restart the camera if prompted. This customization allows for consistent remote access and stable connectivity across your network. Always note the new IP address for future access.

Device Setup and Management
This section guides you through configuring and managing your SV3C camera, ensuring optimal performance and functionality through proper settings and feature utilization.
4.1 Registering and Logging Into the Camera
Registering and logging into your SV3C camera is essential for initial setup and remote access. Begin by downloading and installing the official SV3C app or software. Create an account by providing a valid email address or phone number, then follow the in-app instructions to connect your camera to the network. Once registered, log in using your credentials to access the camera’s interface. Ensure your internet connection is stable for seamless registration and login. After successful login, you can customize settings, view live feeds, and manage notifications. Secure your account with a strong password and enable two-factor authentication for enhanced security. Always use the latest version of the app for optimal functionality.
4.2 Updating Firmware for Optimal Performance
Regular firmware updates are crucial for maintaining optimal performance and unlocking new features of your SV3C camera. To update the firmware, log into the camera via the app or client software and navigate to the settings menu. Check for available updates and follow the on-screen instructions to download and install the latest version. Ensure the camera remains powered on throughout the process to avoid interruptions. Firmware updates enhance security, improve functionality, and resolve any bugs. Enable auto-update settings to receive notifications for future updates. Always verify the update source to ensure it is official and compatible with your camera model. Updated firmware ensures smoother operation and better compatibility with connected devices.
4.3 Accessing the Camera via Browser or Client Software
To access your SV3C camera, you can use either a web browser or the dedicated client software. For browser access, open a compatible browser (e;g., Chrome or Firefox), type the camera’s IP address in the address bar, and log in with your credentials. Alternatively, download and install the SV3C client software from the official website; Launch the software, add the camera by entering its IP address, and log in to view the live feed. Both methods provide remote access to the camera’s video feed, settings, and features. Ensure your device has a stable internet connection for smooth access. Refer to the manual for detailed steps and troubleshooting tips if needed.

Key Features of the SV3C Camera
The SV3C camera boasts a robust set of features, including motion detection, night vision, two-way audio, and high-resolution video streaming, designed to enhance your surveillance experience.
5.1 Motion Detection and Alerts
The SV3C camera offers advanced motion detection capabilities, enabling it to identify and alert users to movement within its field of view. Users can adjust sensitivity levels to minimize false alerts caused by minor movements, such as pets or foliage. Once motion is detected, the camera can trigger notifications via email or through its companion app. Additionally, it can automatically start recording footage, ensuring no important moments are missed. For enhanced customization, users can set up specific alert zones and schedule detection periods. This feature is particularly useful for home or business security, providing real-time updates and peace of mind.
5.2 Night Vision and Low-Light Performance
The SV3C camera excels in low-light conditions with its built-in infrared (IR) LEDs, providing clear night vision up to 30 feet. These LEDs automatically activate in low-light environments, ensuring 24/7 surveillance. The camera also features enhanced low-light sensitivity, capturing detailed footage even when ambient light is minimal. Users can adjust settings to optimize night vision performance, such as reducing IR glare or fine-tuning brightness. This feature is essential for outdoor security, delivering crisp video quality in both daylight and darkness. With its robust night vision capabilities, the SV3C camera ensures uninterrupted monitoring, offering users peace of mind and reliable security coverage.
5.3 Two-Way Audio Communication
The SV3C camera features a built-in microphone and speaker, enabling two-way audio communication. This allows users to speak to individuals near the camera remotely, ensuring real-time interaction. The microphone captures clear audio, while the speaker delivers high-quality sound. To activate this feature, users can enable it through the camera’s software or app. Adjustments can be made to sensitivity settings to optimize audio performance. This feature is ideal for communicating with visitors, warding off intruders, or even comforting pets. The two-way audio function enhances the camera’s versatility, making it a valuable tool for both security and convenience. Proper setup ensures seamless communication, providing users with an interactive surveillance experience.
5.4 Video Quality and Resolution Settings
The SV3C camera allows users to customize video quality and resolution settings to meet specific surveillance needs. Resolution options include 720p, 1080p, and higher, ensuring crisp and clear footage. Users can adjust settings via the camera’s software or app, enabling optimization for lighting conditions, storage capacity, and bandwidth usage. Higher resolutions provide greater detail but may require more storage space. Additional features like contrast, brightness, and saturation can be fine-tuned for enhanced image clarity. The camera also supports night vision and Wide Dynamic Range (WDR) for improved low-light performance and balanced exposure; By configuring these settings, users can achieve optimal video quality for reliable monitoring and security. Proper adjustment ensures clear and usable footage in various environments.

Advanced Settings and Customization
Customize your SV3C camera with advanced settings like RTSP/ONVIF support, motion tracking, and cloud storage integration. Tailor security features, video streams, and notifications to suit your needs perfectly.
6.1 Enabling RTSP and ONVIF Support
Enabling RTSP (Real-Time Streaming Protocol) and ONVIF (Open Network Video Interface Forum) support on your SV3C camera allows for seamless integration with third-party systems and devices. These protocols enable streaming video and audio over IP networks and ensure compatibility with a wide range of surveillance software and hardware. To activate these features, access the camera’s web interface, navigate to the network or advanced settings menu, and check the boxes to enable RTSP and ONVIF. Consult the manual for specific port details and configuration steps. This setup enhances remote access and compatibility, making your camera more versatile for advanced surveillance needs.
6.2 Setting Up Cloud Storage Integration
Configuring cloud storage integration for your SV3C camera ensures your footage is securely stored and accessible remotely. To set this up, log into the camera’s web interface and navigate to the cloud storage settings. Select your preferred cloud service provider, such as Amazon S3, Google Drive, or other supported platforms. Enter your account credentials and configure storage settings like retention period and file format. Ensure a stable internet connection for seamless upload. This feature allows you to access recordings from anywhere and provides an additional layer of security for your video data. Refer to the manual for specific instructions tailored to your camera model and cloud service.
6.3 Configuring Motion Tracking and Alerts
To enhance security, the SV3C camera allows you to configure motion tracking and alerts. Start by accessing the camera’s web interface and navigating to the motion settings menu. Enable motion detection and define detection zones by drawing rectangles over specific areas in the video feed. Adjust sensitivity levels to minimize false alerts caused by minor movements. Set up alerts by specifying notification preferences, such as email or app alerts, and customize schedules for when alerts should be active. You can also link motion events to cloud storage for automatic video uploads. This feature ensures you’re informed of any activity and can review footage later for further analysis.
6.4 Integrating with Third-Party Software

The SV3C camera supports integration with third-party software, enhancing its functionality for advanced users. To enable this, ensure RTSP and ONVIF protocols are activated in the camera settings. Popular software like Blue Iris or Milestone XProtect can be used for centralized monitoring. Access the camera’s web interface, navigate to the network or advanced settings, and input the RTSP stream URL. For ONVIF, enter the camera’s IP address, port, and credentials in the third-party software. This integration allows features like multi-camera viewing, customized alerts, and recording. Regularly check for compatibility updates to ensure seamless integration with new software versions. This feature makes the SV3C camera versatile for various surveillance systems.

Troubleshooting Common Issues
Troubleshooting common issues with the SV3C camera involves checking connections, restarting the device, and ensuring firmware is up-to-date. Consult the manual for specific error resolutions.
7.1 Resolving Connectivity Problems
If your SV3C camera is experiencing connectivity issues, start by ensuring the power cable is securely connected to both the camera and the power source. Check for any visible damage to the cables or ports. Restart the camera and router to refresh the connection. If using WiFi, verify the camera is connected to the correct network and the signal strength is adequate. For wired connections, ensure the Ethernet cable is properly plugged into both the camera and the router. If issues persist, reset the camera to factory settings or update the firmware to resolve potential software glitches. Contact customer support if problems remain unresolved.
7.2 Fixing Video Feed or Audio Issues
If you encounter issues with the video feed or audio, start by checking the camera’s physical connections. Ensure all cables are securely plugged in and not damaged. Restart the camera and your router to refresh the connection. For video feed problems, verify that the lens is clean and free from obstructions. If the issue persists, check the camera’s settings in the client software or browser interface. Ensure motion detection and night vision features are enabled if required. For audio issues, confirm that the microphone is not muted and the volume is set appropriately. If problems remain unresolved, resetting the camera to factory settings or updating the firmware may be necessary. Always refer to the official manual for detailed instructions.
7.3 Resetting the Camera to Factory Settings
Resetting the SV3C camera to factory settings is a useful troubleshooting step when dealing with persistent issues. To perform a factory reset, first ensure the camera is powered on. Locate the small reset button, typically found on the bottom or side of the device. Use a pin or a thin object to press and hold the reset button for 10-15 seconds. The camera’s LED will indicate the reset process by blinking rapidly. After releasing the button, the camera will reboot with all settings reverted to default. Note that this will erase all custom configurations, so you will need to reconfigure network and other settings afterward.

Additional Resources and Support
Explore official resources and support options to enhance your SV3C camera experience.

- Download the official SV3C camera manual for detailed instructions and guidance.
- Access SV3C customer support for troubleshooting or technical inquiries.
- Find tutorials and guides online for advanced camera setup and customization.
- Regularly check for software updates to ensure optimal performance and security.
These resources provide comprehensive support for maintaining and upgrading your SV3C camera system.
8.1 Downloading the Official SV3C Camera Manual
To download the official SV3C camera manual, visit the manufacturer’s website. Navigate to the Support section, where you’ll typically find a dedicated page for downloadable resources. Enter your camera model number or series in the search bar to locate the correct manual. Ensure the document is published by SV3C to avoid third-party sources that may provide outdated or incorrect information. Once found, click the download link to save the PDF file to your device. This manual is essential for understanding advanced features, troubleshooting, and optimizing your camera’s performance. Always verify the publication date to ensure you have the most recent version.
- Visit the official SV3C website.
- Go to the Support or Downloads section.
- Search for your specific camera model.
- Download the PDF manual for free.
By following these steps, you’ll have access to comprehensive guidance tailored to your SV3C camera model.
8.2 Accessing SV3C Customer Support
For any inquiries or issues with your SV3C camera, accessing customer support is straightforward. Visit the official SV3C website, where you’ll find a dedicated support section. Here, you can submit a ticket detailing your problem, and a representative will respond promptly. Additionally, many SV3C cameras come with a user manual that includes contact information for support. If you prefer direct communication, email support is available for detailed queries. Some regions may also offer phone support for urgent matters. Ensure you have your camera’s model number and firmware version ready to expedite assistance. For quick troubleshooting, refer to the FAQs or community forums on the SV3C website.
8.3 Finding Tutorials and Guides Online
Finding tutorials and guides for the SV3C camera is straightforward, thanks to the extensive online resources available. The official SV3C website often hosts a dedicated support section with downloadable manuals, setup guides, and troubleshooting tips. Additionally, third-party websites like YouTube and forums offer step-by-step tutorials and user-generated content. Many tech enthusiasts and security experts share their experiences and solutions for common issues. Social media platforms and community groups are also excellent sources for real-time assistance and shared knowledge. When searching, use specific keywords like “SV3C camera setup tutorial” or “SV3C troubleshooting guide” to find relevant content. Always verify the credibility of the source to ensure accuracy.
8.4 Checking for Software Updates
Regularly checking for software updates is essential to ensure your SV3C camera operates at peak performance. Updates often include bug fixes, security enhancements, and new features; To check for updates, log into your camera via the web interface or client software. Navigate to the “Settings” or “System” menu, where you’ll typically find an “Update” or “Firmware” section. Click on “Check for Updates” to see if a new version is available. If an update is found, follow the on-screen instructions to download and install it. Always ensure the camera remains powered on during the update process to avoid interruptions. Checking for updates periodically helps maintain optimal functionality and security for your device.